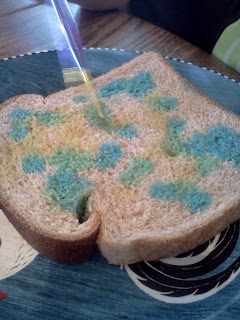
"Painted or Rainbow Toast"

For this project, you will need the following items:
- Milk
- Bread (white works better, but we used wheat, and the colors still showed up)
- Sugar(Powdered works, as well as granulated)
- Food Coloring(we used blue, yellow, and green, Red is Conrad's Favorite, so we are out of that one)
- Small containers(we used baby food containers, you need as many as the amount of colors you want)
- Brand new paintbrushes, or a basting brush
- A baking pan of some sort( we used a pizza pan, since we only painted two pieces of bread)
- Cooking spray
To make the paint, pour a small amount of milk into each small container. Then add about a teaspoon of the sugar, and 2-3 drops of the food coloring (one color for each cup) and stir together.
The "paints" will look something like this.
(note: if you use powdered sugar, the solution will be a little thicker. If you use granulated sugar, the sugar won't dissolve as quickly.)

Shown here, are examples of both ways to paint the bread.
For the bread on the left, we used the syringes.
For the bread on the right, we used the paintbrush.
When you are finished, Place your bread on the sprayed baking pan, and bake until the painted part is lightly toasted, and no longer soggy. This took about ten minutes with ours. Once it is finished being toasted, you may butter the toast if you wish, or eat it as is. Conrad asked to butter his. The final Product should look something like this:
For this project you will need the following items:
- Milk
- Food coloring
- Liquid Dish Soap
- A clear shallow Pan or container with a flat bottom
First, You need to pour milk into the container you have chosen. The milk should sit about an inch deep in the bottom of the pan. Next add a drop or two of each color of food coloring. Be sure to put each color in a different spot.
This step should look something like this. I put two drops in each spot, but depending on the size of your container, you can play with the amount, and the spacing.
Add a drop of dish soap onto each spot of color. Then, sit back and enjoy the "Eruptions"
We only had Skim Milk to do this Experiment with, but the Fattier the Milk, the better this will work!
Happy Playing My friends! :)


I love the rainbow toast! You have some fun ideas to share. Be sure and add a followers button when you get the chance so I can follow you the next time I come to visit.
ReplyDeleteI would love for you to come visit me when you get the chance. =)
Heather
Heather's Heart
Thanks for the feed back! I am not sure how to add a follower's button...but I will figure it out! :)
ReplyDelete