Tuesday, June 19, 2012

An Alternate to Ice Cream, on a Hot Summer Day!

With the summer temperatures rising, I am always looking for ways for the kiddos and myself to cool off! Today's activity is a healthy alternative to ice cream, that is simple to make. I made two different versions, so Reece could enjoy it as well!

To make this delicious frozen treat, you will need the following items:


  • a Blender
  • Frozen banana Slices
  • Cinnamon
  • Vanilla
  • Cocoa Powder
  • Ice Cubes
  • Peanut Butter
  • Milk(optional)


 As stated above, I made two batches, so Reece could have his own dairy, peanut butter, and chocolate free ice cream! :) For the first batch, I had Conrad dump in the bananas(one and a half bananas per batch).


Next, I had Conrad sprinkle cinnamon over the top of the bananas. (I did have to stop him, because he was ready to dump the whole container in, He LOVES cinnamon! )


Next, I had Conrad add about a teaspoon of vanilla, and then we threw about five ice cubes in.
For Plain Cinnamon banana "ice cream", you are ready to blend. If you want to make the Chocolate Peanut Butter Banana Ice Cream, Continue with the next couple of steps! :)


Next, I had Conrad dump in three tablespoons of cocoa Powder. I thought this was the perfect amount, but you can adjust it to your liking.


And finally, two tablespoons of peanut butter. When all was added, I attempted to blend it together. The problem was, there wasn't enough liquid in the blender, and the bananas were still frozen, so I ended up adding a bit of water to the plain mixture, and about a tablespoon of milk to the chocolate mixture. Once that was finished, I blended it all together, until it was a creamy mixture, that had the look and texture of soft serve ice cream.  Put the mixture into the freezer for a couple of hours, and when it is frozen, it is ready to Eat! :)


Here is what the plain Mixture should look like before you put it in the freezer.


Here is a picture of Reece enjoying his ice cream! :)
He wouldn't take it from his spoon, so I ended up putting it on his tray to eat/explore.


Here is the Chocolate Peanut butter version once it was blended.. because of the milk, this mixture was a little bit creamier.


This is the final result. As you can see, it looks like regular ice cream. The texture is pretty close to the ice cream you would buy in the store as well! I will most definitely be making this again during the summer! :)

Wednesday, June 6, 2012

Cloud Dough, and Alpha-bingo

This week's project was messy and fun!

Cloud Dough

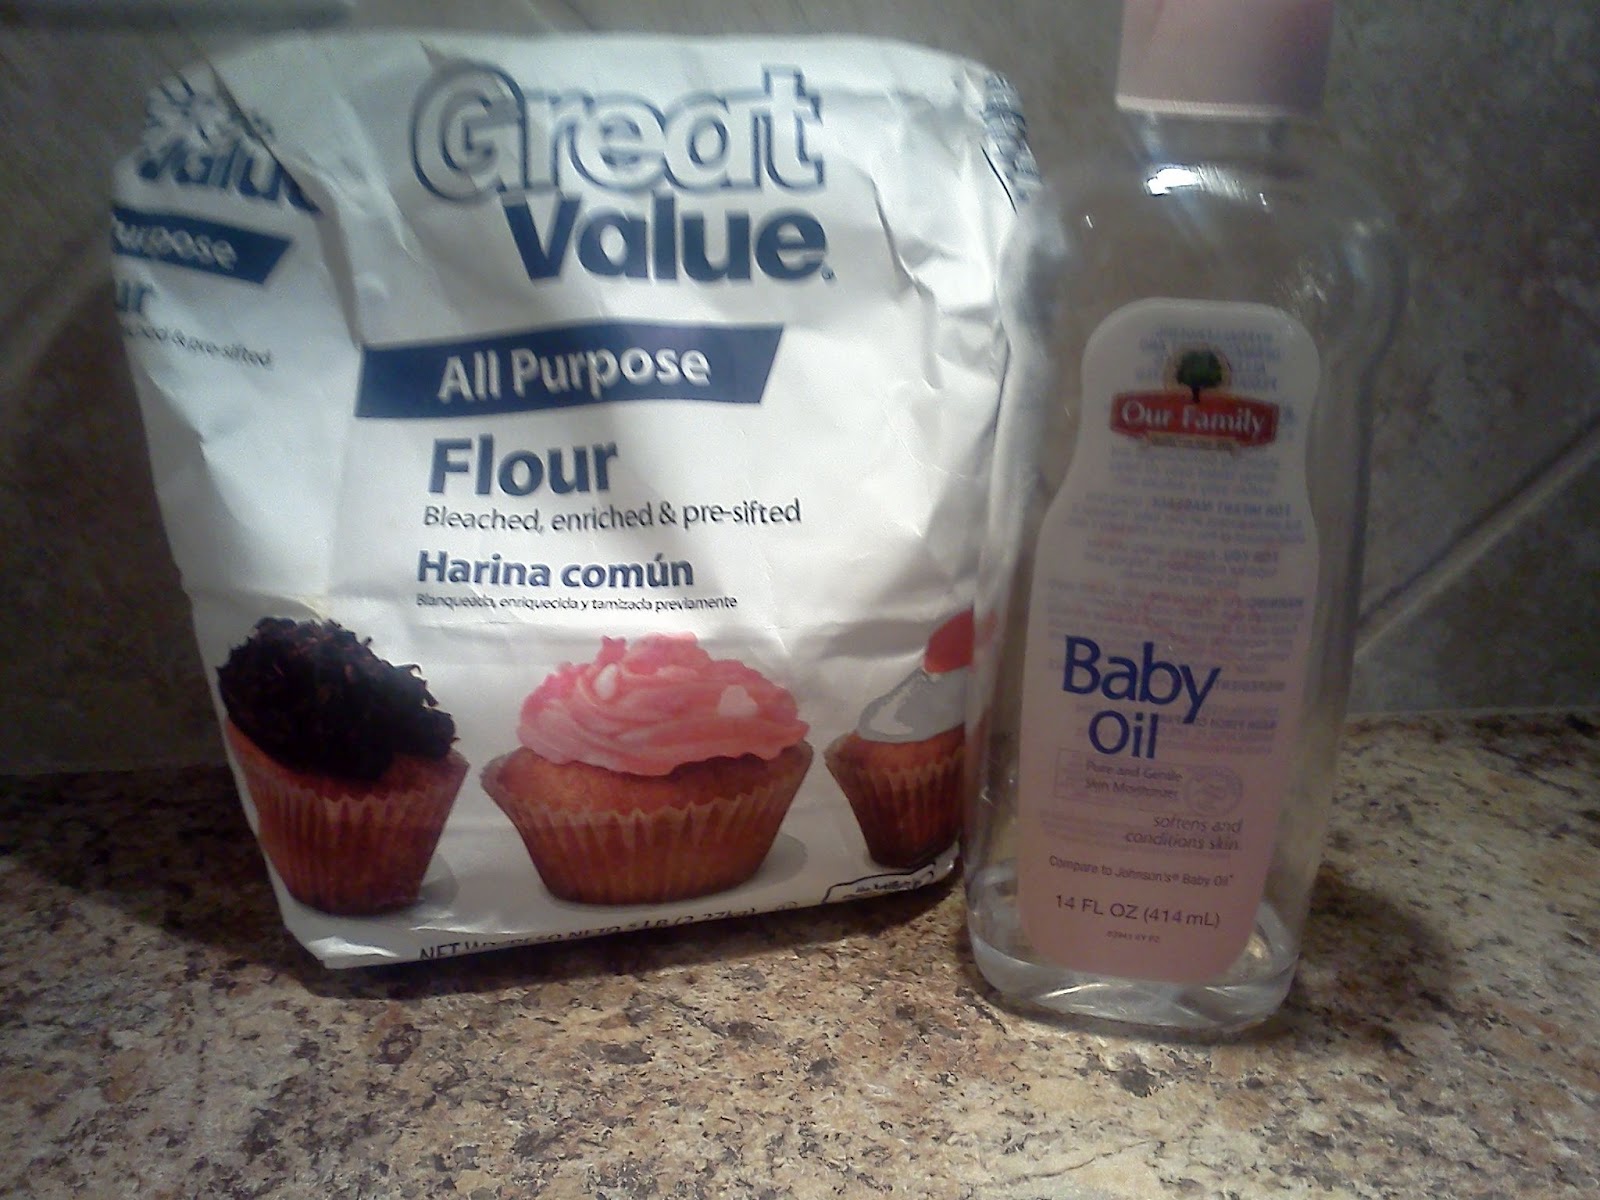
here are the supplies needed to make cloud dough:

  • 8 parts Flour
  • 1 part Baby Oil (you can use any cooking oil, but baby oil smells nicer)
  • Large Container or Sensory Tub


 Dump the flour into the large container, and pour the oil over the top.

( Note: I used two cups of flour, and a quarter cup of oil, as I was  only making enough dough for one child. If you are making dough for more than one child, you may want to play with amounts. The original recipe I found, used 8 cups of flour and one cup of baby oil )


Next mix the oil and flour together using your hands. Conrad wanted to help with this part, so I started mixing, and then let him get his hands into it to finish the process. This was a lot of fun for both of us, and as a bonus, made our hands extremely soft!


I gave Conrad some different small containers, small cups, measuring spoons, and hollow shapes from a shape sorter to mold and build with. The following pictures are some of the results of his free play in the cloud dough.


This dough is a lot of fun to play with and run your fingers through. It molds well, but is also pretty soft. If you add enough oil, you may be able to gently pick up the shapes you make to stack them, or make a pattern. It also stores well (I filled six babyfood containers with ours)

ALPHA-BINGO


The next activity is something I created to help Conrad learn his alphabet by sight. I found it useful, and I hope you can as well!

To make the game of Alpha-bingo, you will need the following items:

  • Construction paper(whatever colors you choose)
  • A marker (I used a black marker)
  • Tape or glue
  • Some sort of alphabet markers (we used alphabet magnets)
  • place markers (we usually use stones from Mancala)
Instead of Telling you how to make your own bingo cards, I decided to post pictures of ours.


Our Alpha-bingo game
A game in the process of being played

 The Game is played just like bingo, you call out the letter, and the child(ren) find them on the bingo cards, and place a marker over them. When I play with Conrad, I don't show him the letters, so he has to know what they are by sight in order to mark them. We play like a blackout game of Bingo, where the whole card must be filled to win.

As you can see, I used six colors to make our cards, and each card has a different colored back. When we play, I let Conrad choose which color card he wants to play on. After each game, I give him the option of switching cards.

Tuesday, May 22, 2012

Experimenting in the Kitchen, and Playing with Flour

Today's post is from some projects we did a few weeks back, but I figured now was a good time to post!
as a kid, one of the things I remember always having fun with was cooking. My mother was never afraid to let my sister and I experiment, and create new "recipes" to make. Some of my favorite recipes actually came from these kitchen experiments, and so I decided to let Conrad play with a few things around the kitchen.

For this project you will need:
  • a muffin tin
  • small cups or bowls (baby food containers work well)
  • several cooking ingredients(we used several spices, and other things we found in the cupboard, including uncooked rice, mint chocolate chips, and cheerios. We also used milk and water, so the items would mix wet)
  • at least one spoon
  • A very creative and adventurous child!
Lay out everything as shown in the picture above, and let the child explore and taste! :) as you can see from the following pictures, Conrad had a blast making concoctions, and trying them. Be forewarned, The child you are setting this up for, may as you to try his/her concoction, and you must not be afraid! :)


 Conrad made several different concoctions, and told me each of them was delicious! :) The one he is seen eating had everything in  it...pizza sauce, choc chips, rice, cheerios, water, milk, salt, cilantro, baking soda, chili powder, cinnamon, garlic powder, powdered sugar, and flour...but he loved it! This activity is also a good way to get your child to try something they may say they don't like when you use it! :)


For the next activity, you may want to have a broom standing by, or lay out a drop cloth before beginning.
you will need the following to have fun with this activity:
  • flour(we used wheat, but you can use whatever you wish)
  • a baking sheet or cake pan
  • toy cars
  • small toys( again, we used dinosaurs, because those are one of Conrad's favorites)
  • small cups, measuring cups, and measuring spoons
  • and hollow shapes, or small sand toys if you have them
Conrad had a blast doing this activity the first time, so we did it again a few weeks later, only modified it!


As you can see, The first time, we used a cake pan. I filled it about half way with flour, and then threw in some measuring spoons, some hollow shapes, and a few old baby food cups. Conrad enjoyed building "castles" and shapes out of flour!


He also enjoyed "measuring" flour to put into the baby food cup, and seeing how much would fit. he scooped and dumped, and packed in flour like a pro!


The second time we did the activity, we used a cookie sheet. Before we did this, we used the flour to practice writing some letters Conrad has difficulty with. When we had finished, I got out his favorite car, and some dinosaurs, and he had a blast making his own race tracks in the flour. At one point, he even decided his car was a snow plow, and the flour was snow.


As you can see, this activity could turn out to be pretty messy (flour spills out of the pan, ends up on tables, chairs and floor, as well as child) hence the reason behind the drop cloth. If you have no drop cloth, be sure to have a broom  and dustpan nearby.

Both time we played with flour, this kept Conrad busy for over an hour! :)

Monday, May 14, 2012

Ice cubes and Dinosaurs

Today's project is very simple to set up, and requires only a few supplies.

To do this activity you will need:
  • A large tub or bucket
  • ice cubes
  • small toys of some sort(I used dinosaurs, one of Conrad's favorites)
Put the ice cubes into the tub or bucket, and then place the small toys in as well. Let the child play and create, and use their imagination! :)

Here are some pictures of Conrad's ideas! (Note: I got permission to post pictures on my blog of the boys):


First Conrad decided they were playing Hide and Seek in the ice cubes, and he "buried" them. Then, he had the other dinosaurs "search" for the buried dinosaurs to save them from getting too cold! :)


Next, the dinosaurs were ice skating, and swimming between the ice cubes, and the water in the bottom from melted cubes!


Then, he built a mountain out of the ice cubes(with a little help from me) and had the dinosaurs climbing up and down the mountain. The ice cubes had melted enough at this point, that we had to keep rebuilding the mountain, because it would collapse every time we put a new dinosaur onto it!


Finally, Conrad decided the ice cubes were a beach, and the water was the ocean. He said the dinosaurs needed to go swimming, because it was too hot for them.


Conrad had a lot of fun with this, but it was a short project, because his hands were quickly getting cold. I would suggest a pair of gloves or mittens to do this project, or a bowl of warm water.

I also decided Reece shouldn't be left out of the fun, so I set him up in his chair, and gave him some ice cubes(no dinosaurs) to play with! He had fun exploring them, squeezing them, splashing in the puddles the melted cubes had made, and sucking on them! The ice cubes are also great for a teething child! :)


Note: If you give an infant ice cubes, be sure to keep a close eye on the child, if the ice cubes get too small, take them away from the child, as they can be a choking hazard.

Monday, May 7, 2012

Fun With Milk and Food Coloring

Today's Projects are both simple, and fun, and use things most people have in their house on a regular basis!

"Painted or Rainbow Toast"


 For this project, you will need the following items:
  • Milk
  • Bread (white works better, but we used wheat, and the colors still showed up)
  • Sugar(Powdered works, as well as granulated)
  • Food Coloring(we used blue, yellow, and green, Red is Conrad's Favorite, so we are out of that one)
  • Small containers(we used baby food containers, you need as many as the amount of colors you want)
  • Brand new paintbrushes, or a basting brush
  • A baking pan of some sort( we used a pizza pan, since we only painted two pieces of bread)
  • Cooking spray
Set the Oven Temp to 350, and let it preheat. Spray the baking pan lightly with the cooking spray.


To make the paint,  pour a small amount of milk into each small container. Then add about a teaspoon of the sugar, and 2-3 drops of the food coloring (one color for each cup) and stir together.


The "paints" will look something like this.
(note: if you use powdered sugar, the solution will be a little thicker. If you use granulated sugar, the sugar won't dissolve as quickly.)


Now, you are ready to paint your bread! Using the paintbrush gently paint the bread with all of the colors, in any design you want. Be careful not to use to much paint, or the bread will get soggy, and you won't be able to toast it. we only had one paintbrush, so we used syringes to slowly squirt the paint on little by little into dots and lines.


Shown here, are examples of both ways to paint the bread.

 For the bread on the left, we used the syringes.

For the bread on the right, we used the paintbrush.


When you are finished, Place your bread on the sprayed baking pan, and bake until the painted part is lightly toasted, and no longer soggy. This took about ten minutes with ours. Once it is finished being toasted, you may butter the toast if you wish, or eat it as is. Conrad asked to butter his. The final Product should look something like this:


"Colorful Milk Eruptions"


For this project you will need the following items:
  • Milk
  • Food coloring
  • Liquid Dish Soap
  • A clear shallow Pan or container with a flat bottom


This is a fun Experiment that I found again, but remember doing in elementary school.

First, You need to pour milk into the container you have chosen. The milk should sit about an inch deep in the bottom of the pan. Next add a drop or two of each color of food coloring. Be sure to put each color in a different spot. 


This step should look something like this. I put two drops in each spot, but depending on the size of your container, you can play with the amount, and the spacing.


 Add a drop of dish soap onto each spot of color. Then, sit back and enjoy the "Eruptions"

We only had Skim Milk to do this Experiment with, but the Fattier the Milk, the better this will work!


Happy Playing My friends! :)

Monday, April 30, 2012

Green Eggs and Ham, And Some Yummy Gummy Candies

One of Conrad's favorite books to read is "Green Eggs and Ham" By Dr. Seuss. He also loves scrambled eggs, so, I decided to make green eggs and ham for breakfast.


It was a lot of fun for Conrad, and simple to make. Just add green food coloring to the scrambled egg mixture before pouring it into the pan. Then, as you scramble the eggs, toss in the ham.(I used diced lunch meat.)

(Note: if you use egg yolks to make these, use blue food coloring, and it will be a deeper green color. I had to experiment with it for awhile to get a good color)


The second time we made this, There was no ham in the house, so we used turkey instead. I also threw on some cheese, as Conrad wanted cheesy eggs.


 And of course, because Conrad was having green eggs, he insisted that mine should be colored too. He chose blue for me, so I had a blue omelet!

Conrad enjoyed helping me make these fun breakfasts, but he enjoyed eating them even more! When we were finished with breakfast, we read  "Green Eggs and Ham" to finish off our morning!


 "Yummy Gummy Candies"

For this activity/recipe, you will need the following items:
  • An Ice cube tray, or Candy molds
  • a small sauce pan
  • two packets of sugar free Jello-any flavor
  • six envelopes of plain Gelatin
  • 1/2 cup of water
Conrad and I have made these gummy treats several times. They are fun for everyone involved, quick and simple to make, and because they are made with sugar free jello, they are 0 points for those of you who count points with Weight Watchers.

First, you need to put all the packets of Jello and gelatin into the sauce pan with the water. (I had Conrad dump them in for me, and then move away from the stove for the next part) Next, turn the burner on a low setting, and stir the mixture until it has melted down with no lumps. When you are finished, and all the lumps are gone, pour the mixture into the ice cube trays or candy molds. (Note, I split the batch in half, and made half lime, half raspberry.)

Place the molds into the freezer for 10 Minutes. Remove from freezer, and pop the gummies out of  the molds. I was concerned when I first made these, that the gummies would be difficult to get out of the molds, But I found that if I used a butter knife and slid it down the side of the candy, it popped out of the mold with ease, and didn't damage the gummy.


This is the end result. I chose to cut these into smaller pieces, since I used ice cube trays, as they were pretty big for small mouths. Since the first time we made these, Conrad and I have made them twice more. The third time we made them, we did not cut them up, and called them "Dino Eggs" for our field trip to the dinosaur museum. These make a great little snack, especially if you, like me, enjoy gummy candies, but without the sugar.


Monday, April 23, 2012

Fun with vinegar, food coloring, and Baking soda

Growing up, my mother used to do all sorts of fun projects with my sister and I. Recently, I was reminded of today's project, when I ran across it on Pinterest. I decided Conrad would appreciate it, and so...today's science activity began! :)
For this project, you will need the following items:
  • White Vinegar
  • Baking soda(we used a whole box)
  • Food coloring
  • egg cups, or small containers(we used baby food containers)
  • a large baking pan
  • Medicine droppers, or syringes 


 Dump the baking soda into the baking pan, and spread it out until it covers the bottom of the pan. Next, Pour vinegar into the small containers, and add a few drops of food coloring to each container.

Use the Medicine droppers and syringes in the vinegar solution, as seen above.
Now, Have fun filling syringes with vinegar and dropping them onto the baking soda. The results will turn out something like this:
You can also experiment with mixing colors. I used this as an opportunity to talk with Conrad about what the different colors make when mixed.
Conrad had a lot of fun playing with the color explosions, and asked a lot of questions about the colors mixing. I also enjoyed myself (mixing colors has always been one of my favorite things to do, and I love the rainbow look of things).
This project was simple to set up, easy for most ages to do, and fairly easy to clean up. I must warn, that because you are using vinegar with food coloring, the solution will stain clothing, and possibly hands. I had Conrad take off his white shirt before we began.

The Biggest surprise for me came when I was cleaning up. As I began to rinse the leftover mixture down the sink...the ugly brown-green color from the top went away, and this is what I got:

 as I said before, I love mixing colors, and I love rainbows. When this appeared underneath the gross brown-green color, I was pleasantly surprised! I had already sent Conrad outside to play, so he didn't get to see this, but you can bet next time we do this project, I will remember to show him! :)